
how to convert automatic to manual
- Published
- in Manuals
Converting an automatic car to a manual transmission is a complex process that offers a more engaging driving experience, greater control, and precision, enhancing the connection to the road.
1.1. Overview of the Conversion Process
Converting an automatic car to a manual involves replacing the automatic transmission with a manual gearbox, clutch assembly, and associated components. This requires removing the automatic transmission, installing the manual unit, and adapting the wiring, pedals, and shifter. Key steps include sourcing a donor transmission, modifying the crossmember, and ensuring proper alignment of the flywheel and spigot bearing. The process demands mechanical expertise and careful planning but offers a more engaging driving experience.
1.2. Why Convert from Automatic to Manual?
Drivers opt for manual conversion to gain better control and driving precision, experience a more engaging ride, and enhance performance through reduced power loss. Manual transmissions eliminate torque converter inefficiencies, offering a direct connection to the axles and preserving horsepower. This conversion also fosters a deeper mechanical connection, appealing to enthusiasts seeking a hands-on driving experience. Additionally, it can provide a sense of accomplishment and customization, making the vehicle more tailored to personal preferences;
1.3. Benefits of Manual Transmission Over Automatic
Manual transmissions provide enhanced driver control, improved fuel efficiency, and direct power delivery, eliminating torque converter inefficiencies. They reduce power loss, offering better acceleration and responsiveness. Manuals are lighter, simpler, and require less maintenance than automatics. Drivers experience a more engaging and precise driving experience, with a mechanical connection to the vehicle. Additionally, manuals often cost less to repair and maintain, making them a preferred choice for driving enthusiasts and performance seekers.

Feasibility and Cost Considerations
Converting an automatic to manual is feasible but complex and costly, requiring donor parts and significant labor. Costs vary widely, depending on the vehicle and donor availability.
2.1. Assessing the Complexity of the Conversion
Converting an automatic to manual transmission involves significant mechanical challenges, requiring a donor car with compatible parts and a deep understanding of the vehicle’s systems. The process demands precise adjustments to wiring, clutch installation, and gearbox alignment. While feasible, it necessitates specialized tools and expertise, making it a complex undertaking for novice mechanics. Proper planning and research are essential to ensure a smooth conversion, as mistakes can lead to costly repairs or functional issues.
2.2. Estimated Costs for Parts and Labor
The cost of converting an automatic to manual transmission varies widely, depending on the vehicle and donor parts availability. Key components like the manual gearbox, clutch assembly, and flywheel can range from $1,500 to $4,000. Labor costs, if hiring a professional, typically add $2,000 to $5,000, depending on complexity and location. Additional expenses for wiring, pedals, and tailshaft modifications can increase the total cost to $6,000 to $10,000 or more, making it a significant financial investment.
2.3. Time Required for Completion
Converting an automatic to manual transmission is time-intensive, requiring several days to weeks, depending on expertise and vehicle complexity. Basic swaps may take 40-60 hours, while complex conversions, involving wiring or engine removal, can exceed 100 hours. Professional shops often complete the job in 2-4 weeks, considering labor availability and part sourcing. Proper planning and preparation are crucial to ensure timely completion without compromising quality, making it a significant time commitment for DIY enthusiasts and professionals alike.

Parts and Tools Needed
A manual gearbox, clutch assembly, flywheel, and spigot bearing are essential. Tools include a socket set, spanners, torque wrench, and screwdrivers. A donor car’s wiring loom is crucial.
3.1. Essential Components for Conversion
The core components required for a successful automatic-to-manual conversion include a manual gearbox, clutch assembly, flywheel, and spigot bearing. A donor car’s parts, such as the wiring loom, are critical for compatibility. Additionally, a manual pedal assembly, shifter, and clutch cable must be installed. The flywheel and spigot bearing ensure proper alignment with the crankshaft, while the clutch assembly enables smooth gear engagement. These components are fundamental to achieving a functional manual transmission system.
3.2. Tools Required for the Process
A socket set (8mm to 19mm), spanners, adjustable wrench, torque wrench or T-bar, screwdrivers (flathead and Phillips), and a jeweler’s flathead are essential; Gasket sealant, WD40, and a blowtorch may be needed. A clutch alignment tool or estimation method is useful. Additional tools include a scraper knife, soldering iron, and radiator plugs. These tools ensure proper disassembly, adjustment, and reassembly during the conversion process, helping to maintain precision and safety.
3.3. Importance of Donor Car Parts
Donor car parts are crucial for a successful automatic-to-manual conversion, ensuring compatibility and minimizing modifications. Key components like the manual transmission, clutch assembly, flywheel, and pedal box must match your vehicle’s specifications. Using donor parts reduces the risk of mechanical issues and ensures proper integration with your car’s existing systems. Additionally, obtaining the correct wiring loom and tailshaft from the donor car is essential for seamless installation and functionality, avoiding costly errors and ensuring reliability.
Preparing the Vehicle
Preparing the vehicle for automatic-to-manual conversion involves several critical steps to ensure a smooth transition, including draining the transmission fluid, disconnecting the battery, and removing the automatic transmission.
4.1. Draining the Automatic Transmission Fluid
Draining the automatic transmission fluid is a crucial step in preparing the vehicle for conversion. Use a large, flat tray to collect the fluid, ensuring minimal spillage. Carefully unscrew the drain plug located at the bottom of the transmission pan. Allow the fluid to flow freely before replacing the plug securely. Be prepared for potential spills by having rags or absorbent materials on hand. This step ensures a clean and safe environment for further mechanical work.
4.2. Disconnecting the Battery and Cooling System
Disconnecting the battery ensures safety by preventing accidental engine start-up. Locate the battery, typically under the hood or in the trunk, and detach the negative terminal first. For the cooling system, remove the coolant lines from the transmission to avoid fluid leakage. Use jack stands to securely lift and support the vehicle, ensuring it is on level ground. Be cautious with the cooling lines to prevent spills and potential damage to surrounding components. Always prioritize safety and proper isolation of systems before proceeding with mechanical work.
4.3. Removing the Automatic Transmission
To remove the automatic transmission, start by draining the fluid and disconnecting the shifter linkage. Support the transmission with a trolley jack and remove the mounting bolts. Carefully lower the unit, ensuring no damage to surrounding components. Once removed, separate the torque converter and drive plate from the transmission. This step requires precision to avoid damage to the engine or chassis. Proper support and alignment are crucial during extraction to ensure a smooth process and prevent complications later in the conversion.
Installing the Manual Transmission
Align the manual gearbox with the engine, ensuring proper fitment. Secure it using the appropriate bolts, verifying alignment with the spigot bearing and flywheel for smooth operation.
5.1. Mounting the Manual Gearbox
Mounting the manual gearbox requires precise alignment with the engine and drivetrain. Ensure the spigot bearing is correctly positioned in the bellhousing. Secure the gearbox using the appropriate bolts, tightening them evenly to avoid misalignment. Double-check the flywheel and spigot bearing alignment to ensure smooth operation. Proper installation is critical to prevent vibration and ensure efficient power transfer from the engine to the transmission. Verify all connections and alignments before proceeding to the next steps in the conversion process.
5.2. Connecting the Clutch Assembly
Connect the clutch assembly by aligning the flywheel and spigot bearing. Attach the clutch cable to the pedal assembly and ensure the slave cylinder is properly connected. Secure the clutch disc to the flywheel, ensuring correct alignment. Tighten all bolts evenly to maintain balance and prevent vibration. Proper engagement of the clutch assembly is critical for smooth gear shifts and efficient power transfer. Double-check all connections and ensure the clutch operates freely before finalizing the installation.
5.3. Aligning the Flywheel and Spigot Bearing
Aligning the flywheel and spigot bearing ensures smooth operation of the manual transmission. Lightly grease the spigot bearing and install it into the crankshaft. Mount the flywheel onto the engine, securing it with bolts. Use a dial indicator to verify alignment, ensuring the spigot bearing is flush with the flywheel. Proper alignment prevents vibrations and premature wear on components. Once aligned, secure all components tightly to maintain precise transmission function and optimize performance.

Wiring and Electrical Adjustments
Wiring adjustments involve repurposing existing connections and adding new ones for manual transmission compatibility, ensuring proper signal flow and functionality without interference from automatic-specific controls.
6.1. Understanding the Wiring Loom Differences
Differences in wiring looms between automatic and manual transmissions primarily involve connectors and signal pathways. Automatics often have additional plugs for torque converters and computerized gear controls, while manuals focus on clutch and gear engagement sensors. Identifying these variations is crucial to ensure compatibility and proper functionality. The manual loom typically has fewer connectors, simplifying the installation process but requiring careful adaptation of existing wires to match the new transmission’s requirements for smooth operation and accurate signal transmission.
6.2. Rewiring for Manual Transmission Compatibility
Rewiring for manual transmission involves adapting the existing electrical system to support manual-specific components. Key steps include identifying and repurposing wires for clutch and gear engagement, while removing automatic-specific circuitry. The manual gearbox loom typically has fewer connectors, simplifying installation. Ensure proper connections for clutch switches and reverse lights, and verify wiring compatibility to avoid electrical faults. Consulting wiring diagrams is essential to align signals correctly and maintain system functionality after the conversion.
6.3. Disabling Automatic Transmission Controls
Disabling automatic transmission controls involves removing or repurposing components like the torque converter and gear selector. The round plug from the automatic gearbox loom, which handles computer-related functions, should be disconnected. Repurpose existing wires for manual operations, ensuring no interference. Remove automatic-specific sensors and switches, as they are no longer needed. This step ensures the vehicle’s systems adapt solely to manual transmission functionality, preventing conflicts and optimizing performance.

Pedal and Shifter Modifications
Install the manual pedal assembly, ensuring proper alignment and adjustment of the clutch cable for smooth engagement. Fit the manual shifter, completing the driver interface transformation.
7.1. Installing the Manual Pedal Assembly
Mounting the manual pedal assembly requires precise alignment and secure fastening to the existing pedal box. Ensure the clutch pedal operates smoothly, with proper clearance and spring tension. Connect the clutch cable to the pedal and transmission, adjusting its length for optimal engagement. Test the pedal’s functionality to confirm smooth operation and ensure no binding or resistance. Professional assistance is recommended for complex setups to avoid mechanical issues.
7.2. Adjusting the Clutch Cable
Adjusting the clutch cable ensures proper engagement and disengagement of the clutch. Loosen the locknut and adjust the cable length to achieve the correct tension. Tighten the locknut securely after adjustment. Proper tension ensures smooth gear shifts and prevents premature wear. Testing the clutch operation after adjustment is crucial to confirm optimal functionality and driver control.
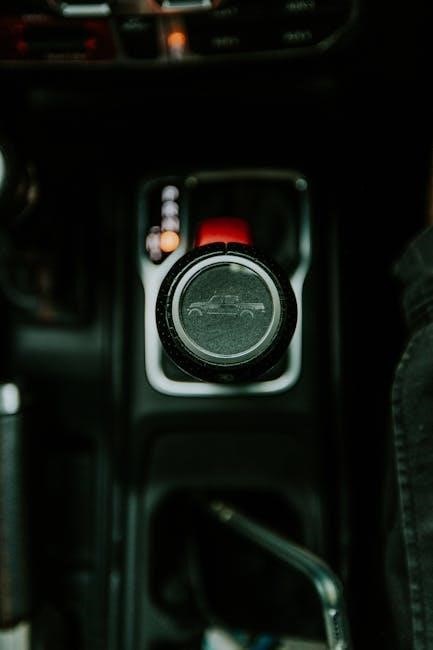
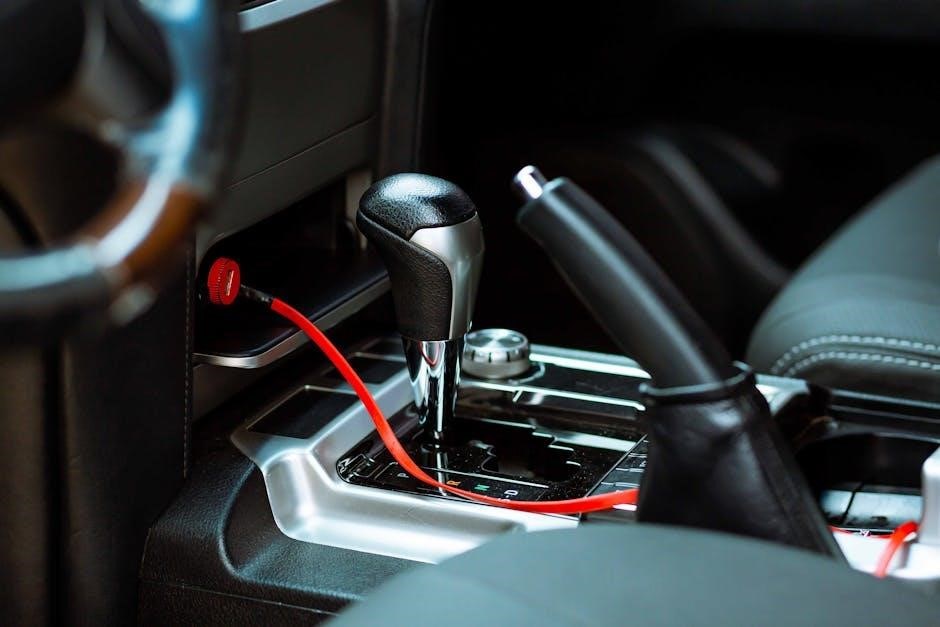
7.3. Fitting the Manual Shifter
Fitting the manual shifter involves aligning it with the transmission and securing it with bolts. Ensure the shifter is properly seated and aligned for smooth gear engagement. Adjustments may be needed for optimal alignment and functionality. Testing the shifter after installation is essential to confirm proper operation and driver control. This step finalizes the mechanical connection between the driver and the transmission, enabling precise gear changes and enhancing the overall driving experience.
Reconnecting Essential Systems
Reconnecting essential systems involves reinstalling the tailshaft, refitting exhaust and cooling lines, and reconnecting the starter motor to ensure proper vehicle functionality and safety.
8.1. Reinstalling the Tailshaft
Reinstalling the tailshaft involves removing it from the automatic transmission and carefully fitting it to the manual gearbox. For EA models, remove the U-bolts attaching the universal joint to the differential. For EB and later models, undo the four bolts securing the flange to the diff. Ensure the universal joints align properly and secure them with circlips. Reattach the tailshaft to the manual transmission, ensuring spline alignment is correct. Tighten all bolts securely to avoid leaks or misalignment during operation.
8.2. Refitting the Exhaust and Cooling Lines
After removing the automatic transmission, the exhaust and cooling lines must be refitted carefully. Start by disconnecting the lines from the radiator and transmission. Remove any remaining fluid and debris. Reattach the cooling lines to the manual transmission, ensuring they are securely fastened. For the exhaust, align the flange with the new manual transmission and tighten the bolts evenly. Use plugs or sealants like Selleys All-Clear to prevent leaks from the radiator holes where the cooler lines were removed.
8.3. Reconnecting the Starter Motor
Reconnecting the starter motor is a critical step after installing the manual transmission. Locate the starter motor, which was previously disconnected, and align it with its mounting points on the manual gearbox. Secure it using the original bolts, ensuring they are tightened firmly. Reconnect the electrical wiring to the starter motor, making sure all connections are clean and secure. Double-check the wiring for any signs of damage or wear; Once reconnected, test the starter motor to ensure it functions properly without any electrical issues.

Testing the Conversion
After completing the manual transmission installation, perform a thorough test drive to ensure proper function. Start by bleeding the clutch system to remove air bubbles.
Check for any leaks and verify smooth gear engagement. Test acceleration, shifting, and clutch operation under various driving conditions.
Make necessary adjustments to achieve optimal performance.
9.1. Bleeding the Clutch System
Bleeding the clutch system is essential to remove air bubbles and ensure proper clutch engagement. Raise the vehicle and use a pressure bleeder or manual bleeding kit.
Pump the clutch pedal several times to pressurize the system. Check for bubbles in the fluid and repeat until the fluid flows cleanly.
Ensure the clutch master and slave cylinders are functioning correctly. If air remains, the clutch may feel spongy or unresponsive. Bleeding ensures precise control and smooth gear shifts.
9.2. Checking for Leaks and Proper Function
After installing the manual transmission, inspect all connections for leaks, ensuring no fluid escapes from the clutch master or slave cylinders.
Start the engine and listen for unusual noises. Test the clutch pedal for proper engagement and disengage smoothly.
Shift through all gears to confirm they engage without resistance. Check the transmission fluid level and top it off if necessary.
Address any issues promptly to ensure smooth operation and prevent further complications.
9.3. Initial Test Drive and Adjustments
Take the car for a test drive in a safe, open area to assess the manual transmission’s performance.
Check for smooth gear shifts and proper clutch engagement. Pay attention to any unusual noises or vibrations.
If issues arise, such as difficulty shifting or slipping gears, return to the garage for adjustments.
Ensure the clutch pedal feels consistent and responsive. Fine-tune the clutch cable tension if necessary.
A successful test drive confirms the conversion’s success and ensures a enjoyable driving experience.

Troubleshooting Common Issues
Identify and address common problems like gearbox noise, clutch engagement issues, and electrical faults to ensure smooth operation after the conversion.
10.1. Addressing Gearbox Noise or Vibration
Gearbox noise or vibration can arise from worn bearings, misaligned gears, or insufficient lubrication. Inspect gears and bearings for wear, ensuring proper lubrication levels. Check for loose mounts or misaligned components during installation. Addressing these issues promptly prevents further damage and ensures smooth operation. Regular maintenance and inspections are crucial to identify and resolve potential problems early.
10.2. Fixing Clutch Engagement Problems
Clutch engagement issues often arise from misalignment, incorrect pedal adjustment, or hydraulic system faults. Ensure the clutch cable or hydraulic system is properly bled to eliminate air pockets. Adjust the clutch pedal’s free play and ensure the clutch disc is aligned correctly with the flywheel. If problems persist, inspect the clutch assembly for wear or damage and replace components as needed. Regular inspections and adjustments can prevent engagement issues and ensure smooth operation.
10.3. Resolving Wiring or Electrical Faults
Wiring discrepancies between automatic and manual transmissions often cause electrical faults. Consult the wiring diagrams to identify mismatches, particularly in the 8-pin plugs. Repurpose existing wires for manual compatibility, disabling automatic-specific controls. Ensure proper connections for the clutch and reverse switches. Test the system post-reconnection to verify functionality. If issues persist, use a multimeter to trace faults. While some functions may require reprogramming, the manual system can operate independently, bypassing unnecessary automatic controls to restore proper electrical operation.
Safety Precautions
Always use jack stands and supports to secure the vehicle. Handle hazardous materials like transmission fluid with care. Ensure proper ventilation when working with chemicals or welding to avoid fume inhalation.
11.1. Proper Use of Jacks and Supports
Always use jack stands and supports to securely hold the vehicle, ensuring stability and safety while working underneath. Raise the car on level ground, lifting to about half a meter for easy access. Use a trolley jack to lift the vehicle and immediately transfer the weight to jack stands. Never rely solely on the jack. Engage the parking brake and use wheel chocks to prevent movement. Ensure the vehicle is stable before starting work to avoid accidents or damage.
11.2. Handling Hazardous Materials
When converting from automatic to manual, handle hazardous materials like transmission fluid, coolant, and brake fluid with care. Always wear protective gloves and goggles to prevent skin and eye irritation. Use proper tools to drain fluids into a sealed container for safe disposal. Avoid inhaling fumes and ensure good ventilation in the workspace. Dispose of hazardous materials according to local regulations to protect the environment. Proper handling prevents accidents and ensures a safe working environment throughout the conversion process.
11.3. Ensuring Proper Ventilation
Proper ventilation is crucial when working on an automatic-to-manual conversion to remove harmful fumes from transmission fluid, coolant, and other chemicals. Open windows or use fans to circulate air, ensuring a well-ventilated workspace. Avoid breathing in hazardous vapors, as they can cause health issues. A well-ventilated area prevents the accumulation of toxic fumes, making the process safer and more comfortable. Always prioritize airflow to maintain a safe working environment throughout the conversion process.
Maintenance After Conversion
Regular maintenance after converting to a manual transmission is essential for longevity. Check transmission fluid levels, inspect the clutch for wear, and schedule professional inspections to ensure optimal performance and prevent issues.
12.1. Regular Fluid Checks
Regular fluid checks are crucial for maintaining the health of your manual transmission. Ensure the transmission fluid level is within the recommended range, using the specified type of fluid. Inspect the clutch system for proper hydraulic fluid levels, as low levels can lead to poor clutch engagement. Avoid reusing old or contaminated fluids, as they may contain debris that could damage the transmission. Regular fluid checks help prevent premature wear and ensure smooth gear shifting and clutch operation. Always refer to your vehicle’s manual for specific fluid requirements and recommendations.
12.2. Monitoring Clutch Wear
Monitoring clutch wear is essential for maintaining smooth gear transitions and preventing premature damage. Check for signs of wear, such as slippage, difficulty shifting gears, or a spongy pedal feel. Regularly inspect the clutch pedal for excessive play or a low engagement point. If the clutch shows significant wear, replace it promptly to avoid costly repairs. Adjust the clutch cable as needed to ensure proper engagement and disengagement. Regular monitoring ensures optimal performance and extends the lifespan of your manual transmission system.
12.3. Scheduling Professional Inspections
Regular professional inspections are crucial to ensure the longevity and reliability of your manual transmission system. Schedule annual check-ups with a qualified mechanic to inspect the clutch, gearbox, and related components. Professional inspections help identify potential issues early, preventing costly repairs. Additionally, routine maintenance ensures optimal performance and safety, providing peace of mind while driving. Regular inspections are a proactive measure to maintain the overall health of your converted manual transmission system and prevent unexpected failures.