The Biology Laboratory Manual 13th Edition by Darrell S. Vodopich and Randy Moore is a comprehensive guide for college-level biology lab courses, offering detailed experiments and modern techniques to enhance student learning and engagement.
1.1 Overview of the Manual
The Biology Laboratory Manual 13th Edition is a comprehensive resource designed for introductory biology courses. It features over 50 exercises covering essential topics such as microscopy, cell structure, genetics, evolution, and human anatomy; The manual provides detailed instructions, visual aids, and modern techniques to enhance hands-on learning. With 624 pages, it is spiral-bound for easy use in lab settings. Published by McGraw Hill in 2022, it is available in both print and digital formats, offering flexibility for students and instructors alike.
1.2 Importance of Laboratory Work in Biology
Laboratory work is essential for developing practical skills and reinforcing theoretical concepts in biology. It provides hands-on experience with scientific methods, allowing students to observe phenomena, collect data, and draw conclusions. Lab activities foster critical thinking, collaboration, and problem-solving, preparing students for real-world applications in scientific research and healthcare. The manual’s exercises are designed to enhance understanding of biological principles through interactive and engaging experiments.
1.3 Target Audience
The Biology Laboratory Manual 13th Edition is primarily designed for college-level students enrolled in introductory biology courses. It serves as a valuable resource for undergraduate students, providing hands-on experiments and activities to complement textbook learning. Additionally, the manual is useful for educators seeking structured lab materials and for students pursuing degrees in life sciences or related fields, offering a comprehensive foundation in biological principles and techniques.
Key Features of the 13th Edition
The 13th edition offers a comprehensive guide with updated experiments, enhanced visuals, and improved organization, providing students with a robust tool for mastering biological concepts and techniques.
2.1 New Updates and Improvements
The 13th edition introduces updated experiments, enhanced visuals, and streamlined content to align with modern teaching methods. New exercises focus on emerging topics in biology, such as genetic analysis and evolutionary studies, providing students with relevant, hands-on experiences. The manual also incorporates digital integration, offering online resources and interactive tools to supplement traditional lab work, ensuring a comprehensive and engaging learning experience for students.
2.2 Comprehensive Coverage of Laboratory Techniques
The 13th edition provides an extensive range of laboratory techniques, from microscopy and cell structure to genetics and evolutionary studies. Each exercise is designed to offer hands-on experience, ensuring students master essential biological methods. The manual covers over 50 exercises, including modern approaches in DNA analysis and human anatomy, making it a versatile resource for both introductory and advanced biology courses.
2.3 Enhanced Visual Aids and Illustrations
The 13th edition features enhanced visual aids, including high-resolution images, detailed diagrams, and updated illustrations. These resources help students better understand complex biological concepts and laboratory procedures. The manual incorporates digital-friendly formats, making it easier for learners to engage with visual content. Improved clarity and accuracy in illustrations ensure a more effective learning experience, aligning with modern educational standards and enhancing overall comprehension of biological principles and techniques.
How to Use the Biology Laboratory Manual
This manual is designed to guide students through laboratory exercises effectively. It emphasizes navigating sections, preparing for sessions, and adhering to safety protocols to enhance learning experiences.
3.1 Navigating the Manual
The Biology Laboratory Manual 13th Edition is organized into clear sections, making it easy to locate specific exercises and procedures. Each chapter is divided into units, focusing on key biological concepts such as microscopy, genetics, and anatomy. Visual aids, including diagrams and illustrations, complement the text, while step-by-step instructions guide students through experiments. The manual also includes a table of contents and index for quick access. Digital versions offer enhanced navigation features, such as a linked table of contents and searchable text, ensuring efficient use.
3.2 Preparing for Laboratory Sessions
Preparing for laboratory sessions involves reviewing the manual’s relevant sections, understanding safety protocols, and gathering necessary materials. Students should read the experiment objectives, materials lists, and procedures beforehand. Familiarizing oneself with laboratory equipment and techniques ensures smooth execution. The digital version allows easy access to supplementary resources, such as videos and interactive guides, to enhance preparation. Organizing lab reports and data sheets in advance also streamlines the learning process during sessions.
3.3 Safety Protocols and Guidelines
The manual emphasizes strict adherence to safety protocols to ensure a secure laboratory environment. Students are required to wear personal protective equipment (PPE) such as gloves and goggles. Proper handling of biological specimens and chemicals is stressed, along with correct disposal of hazardous waste. Emergency procedures, like fire extinguisher locations and spill cleanup, are outlined. The digital version provides quick access to safety guidelines, ensuring preparedness before and during lab sessions.
Authors and Contributors
Darrell S. Vodopich and Randy Moore are the primary authors, with contributions from McGraw-Hill Education’s editorial team, ensuring expertise and accuracy in the manual’s content and design.
4.1 Darrell S. Vodopich
Darrell S. Vodopich, a distinguished biologist and educator, is a key author of the Biology Laboratory Manual 13th Edition. Affiliated with Baylor University, he brings extensive expertise in laboratory education and biological sciences. His contributions to the manual focus on updating experimental designs, ensuring alignment with modern pedagogical approaches. Vodopich’s work emphasizes hands-on learning, making complex biological concepts accessible to students. His collaborative efforts with Randy Moore have significantly enhanced the manual’s clarity and effectiveness in fostering scientific inquiry and critical thinking skills among learners.
4.2 Randy Moore
Randy Moore, a renowned educator and biologist, co-authored the Biology Laboratory Manual 13th Edition alongside Darrell S. Vodopich. Based at the University of Minnesota, Moore specializes in genetics and evolutionary biology. His contributions to the manual include innovative laboratory exercises that integrate cutting-edge research with practical applications. Moore’s approach emphasizes active learning, encouraging students to explore biological principles through experimentation and data analysis, thereby fostering a deeper understanding of scientific concepts and methodologies.
4.3 Publisher and Editorial Team
The Biology Laboratory Manual 13th Edition is published by McGraw-Hill Education, a leading provider of educational resources. The editorial team, comprising experienced professionals, ensures the manual’s content is accurate, up-to-date, and aligned with modern educational standards. Their meticulous work in refining the text, updating exercises, and enhancing visual aids has contributed significantly to the manual’s reputation as a trusted tool for biology education, supporting both instructors and students effectively.

Edition Details and Publication Information
The 13th Edition was published by McGraw-Hill Education on January 14, 2022, with ISBN 978-1-264-13727-5. It is available in spiral-bound format, containing 624 pages.
5.1 Publication Date and ISBN
The Biology Laboratory Manual 13th Edition was published on January 14, 2022. Its ISBN-13 is 978-1-264-13727-5, identifying it uniquely. The digital ISBN is 978-1-264-40602-9. Published by McGraw-Hill Education, this edition contains 624 pages, making it a comprehensive resource for biology lab courses. The ISBN is essential for purchasing or accessing the manual, ensuring authenticity and compatibility with course requirements. This information helps students and educators verify the correct edition for their studies or teaching needs.
5.2 Format and Page Count
The Biology Laboratory Manual 13th Edition is available in Spiral-bound and Loose Leaf formats, ensuring durability and ease of use. It spans 624 pages, providing extensive coverage of laboratory techniques and exercises. The manual’s dimensions are 9.2 x 1.1 x 11.1 inches, making it a portable yet comprehensive resource for students. This format and page count ensure that all essential content is included, catering to the needs of both instructors and students in a biology laboratory setting.
5.3 Publisher Information
The Biology Laboratory Manual 13th Edition is published by McGraw-Hill Education, a leading provider of educational resources. With offices at 2 Penn Plaza, New York, NY 10121, McGraw-Hill ensures high-quality content delivery. The manual is copyrighted by McGraw-Hill Education, reflecting their commitment to academic excellence. This edition is part of their extensive catalog, catering to educational needs across various disciplines, including biology.
Laboratory Safety and Best Practices
The manual emphasizes adherence to safety protocols, proper handling of biological specimens, and responsible waste disposal to ensure a secure laboratory environment for all participants.
6.1 General Safety Guidelines
The manual outlines essential safety protocols to ensure a secure laboratory environment. Students are required to wear personal protective equipment, handle chemicals with care, and follow emergency procedures. Proper use of equipment, safe handling of biological specimens, and adherence to disposal guidelines are emphasized. These practices minimize risks and promote a responsible and safe learning atmosphere for all participants in laboratory activities.
6.2 Handling Biological Specimens
The manual provides detailed guidelines for handling biological specimens safely. Students are advised to wear gloves, use sterile equipment, and maintain proper hygiene to prevent contamination. Specimens should be stored in designated areas and disposed of according to biohazard protocols. Proper labeling and handling techniques are emphasized to ensure the integrity of samples and minimize exposure risks, fostering a safe and controlled laboratory environment for all users.
6.3 Disposal of Laboratory Waste
Proper disposal of laboratory waste is crucial to maintain safety and environmental compliance. Biological waste, including specimens and cultures, must be autoclaved and disposed of in biohazard containers. Chemical waste should be separated and labeled according to type, with disposal following local regulations. Recyclable materials should be processed appropriately. The manual emphasizes adhering to these guidelines to prevent contamination and ensure a safe, environmentally responsible laboratory practice.
Exercises and Activities
The manual includes over 50 exercises covering microscopy, cell structure, genetics, DNA analysis, evolution, and human anatomy, providing hands-on experience aligned with course objectives.
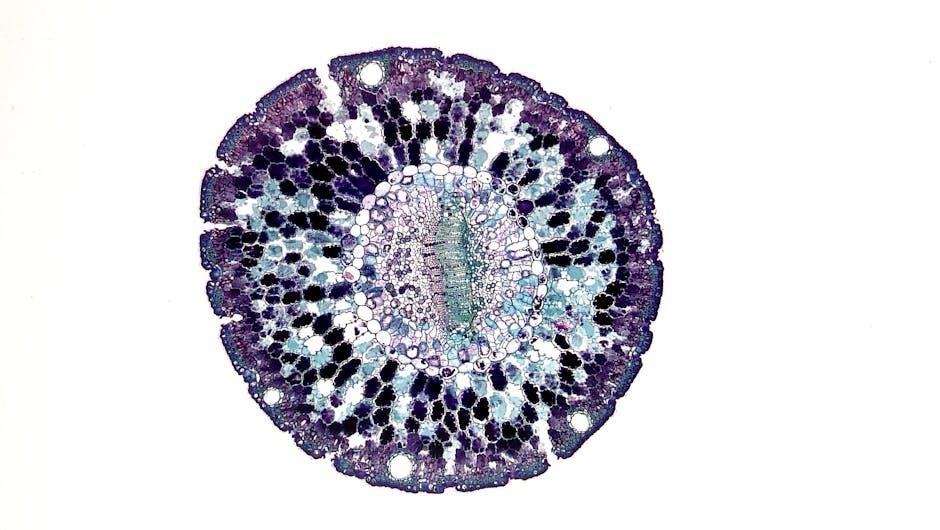
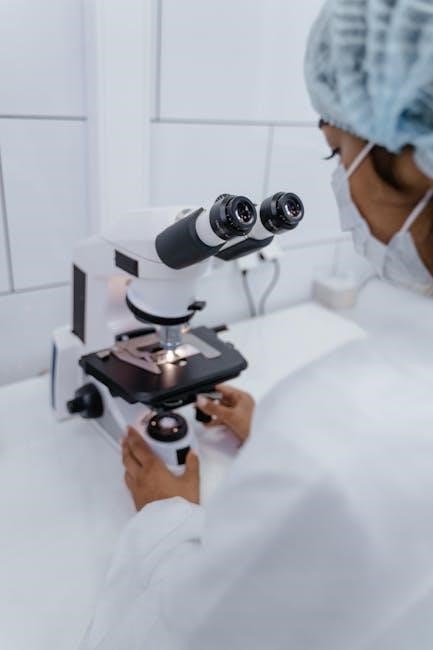
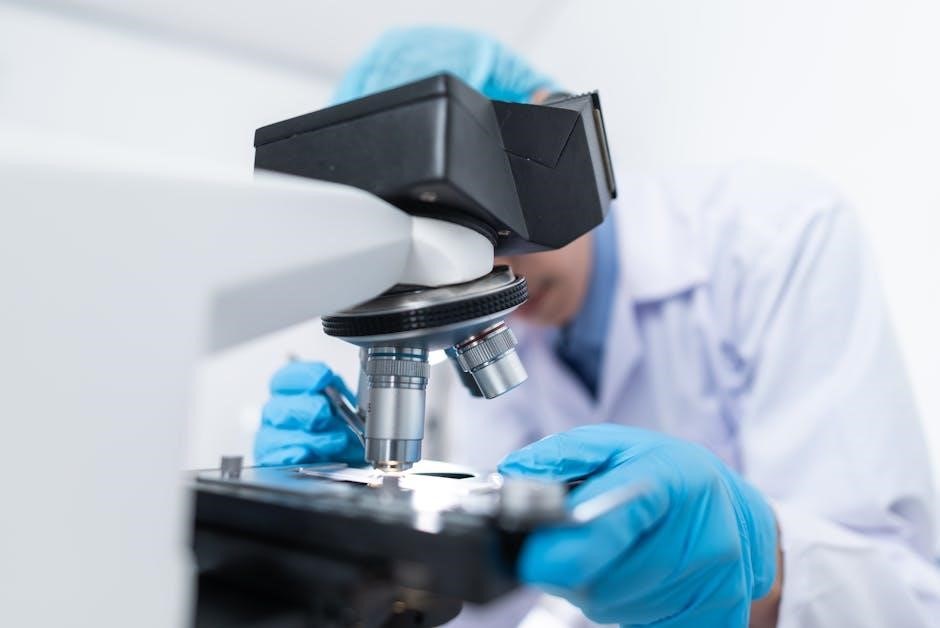
7.1 Microscopy and Cell Structure
This exercise introduces students to the fundamentals of microscopy, teaching proper techniques for preparing slides and focusing specimens. It explores cell structure, emphasizing the identification of key organelles and their functions. Hands-on activities allow students to observe cellular details, reinforcing concepts of cellular biology and the importance of microscopy in scientific research and discovery.
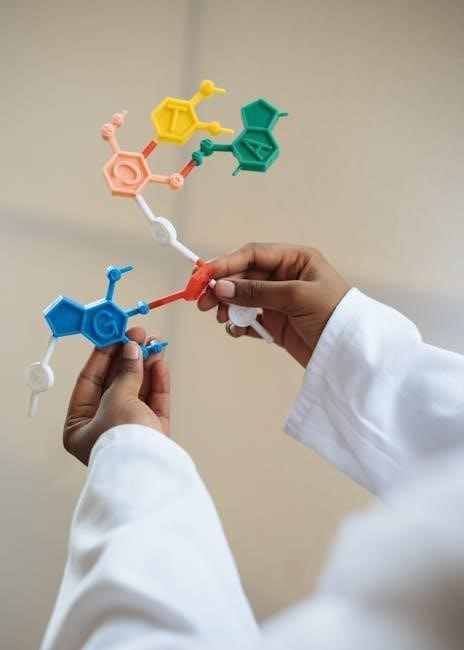
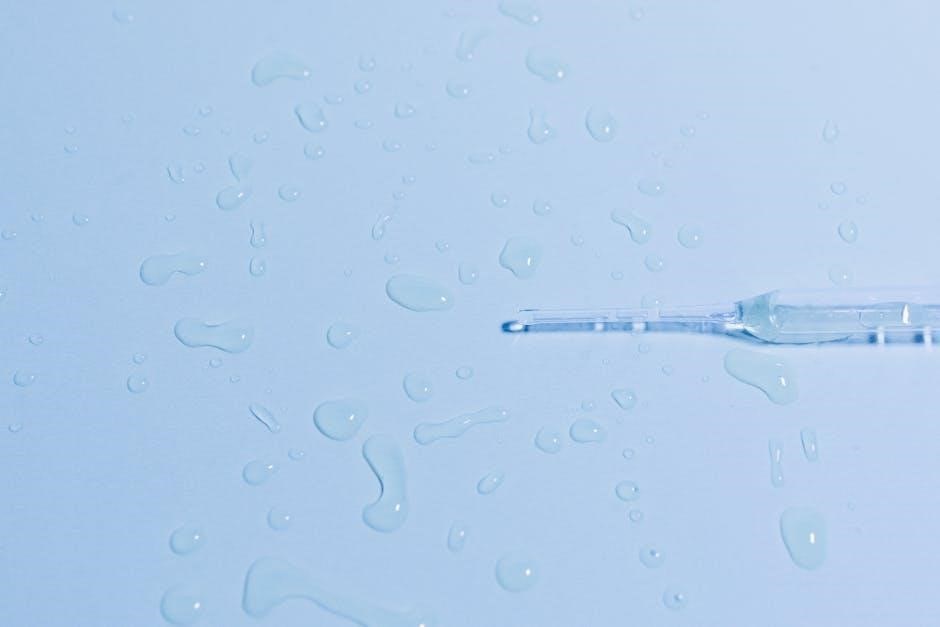
7.2 Genetics and DNA Analysis
This section focuses on genetic principles and DNA analysis, providing hands-on activities to explore inheritance patterns and molecular biology techniques. Students engage in DNA extraction, PCR simulations, and gel electrophoresis to analyze genetic material. These exercises emphasize the practical application of genetic concepts, fostering a deeper understanding of DNA structure, gene expression, and the tools used in modern genetic research and biotechnology.
7.3 Evolution and Natural Selection
This section explores evolutionary principles through interactive labs, simulating natural selection processes and analyzing fossil records. Activities include studying population dynamics, speciation, and phylogenetic trees, enabling students to observe how environmental pressures drive evolutionary changes. These exercises provide practical insights into the mechanisms of evolution, reinforcing theoretical concepts with hands-on investigations and data analysis to understand biodiversity and the history of life on Earth.
7.4 Human Anatomy and Physiology
This section provides hands-on activities to explore the structure and function of the human body. Exercises include studying the skeletal, muscular, and nervous systems through detailed diagrams and dissections. Students analyze physiological processes like blood pressure and reflexes, gaining practical insights into how body systems interact. These labs emphasize the integration of anatomy and physiology, preparing students for advanced studies in health sciences and related fields with a strong foundational understanding.
Scientific Method and Experimental Design
This section guides students through the scientific method, emphasizing hypothesis formulation, experimental design, and data analysis. Practical exercises reinforce critical thinking and reproducibility in biological investigations.
8.1 Formulating Hypotheses
The Biology Laboratory Manual 13th Edition provides clear guidance on formulating hypotheses, a critical step in the scientific method. Students learn to develop testable, specific hypotheses based on observations and research questions.
Exercises emphasize avoiding bias and ensuring hypotheses are falsifiable, aligning with best practices in scientific inquiry. This section equips students with essential skills for designing experiments and interpreting data effectively in biological investigations.
8.2 Conducting Experiments
The Biology Laboratory Manual 13th Edition provides detailed protocols for conducting experiments, ensuring students master essential techniques in biology. Each exercise includes step-by-step instructions, safety precautions, and expected outcomes to guide learners effectively.
From setting up equipment to collecting data, the manual emphasizes reproducibility and accuracy. Students are encouraged to follow proper laboratory practices, ensuring experiments are conducted safely and efficiently, while fostering critical thinking and scientific rigor.

8.3 Analyzing Data
The Biology Laboratory Manual 13th Edition emphasizes the importance of accurate data analysis in biological experiments. It provides clear guidelines for interpreting results, creating graphs, and drawing meaningful conclusions. Students are encouraged to critically evaluate their findings, ensuring data aligns with hypotheses and scientific principles.
Through structured exercises, the manual helps learners develop essential skills in statistical analysis and data presentation, fostering a deeper understanding of experimental outcomes and their biological significance.

Laboratory Reports and Documentation
The Biology Laboratory Manual 13th Edition provides detailed guidance on writing effective lab reports, documenting observations, and presenting results clearly and professionally, ensuring accurate scientific communication.
9.1 Writing Effective Lab Reports
The Biology Laboratory Manual 13th Edition emphasizes the importance of clear and concise lab report writing. It provides structured guidance on including objectives, methods, results, and conclusions. Students learn to present data accurately, ensuring readability and scientific integrity. The manual also offers tips for proper formatting, grammar, and avoiding common errors, helping students develop strong communication skills essential for success in STEM fields.
9.2 Documenting Observations
The Biology Laboratory Manual 13th Edition provides detailed guidance on accurately documenting observations during experiments. It emphasizes the importance of recording precise data, including measurements, descriptions, and sketches. Students are encouraged to use clear and concise language, avoiding subjective interpretations. The manual also offers templates and examples to help organize findings effectively, ensuring that observations are comprehensive and easily reviewable for analysis and reporting.
9.3 Presenting Results
The Biology Laboratory Manual 13th Edition provides clear guidelines for presenting experimental results effectively. It emphasizes the use of tables, graphs, and images to visually represent data. Students are instructed to ensure clarity and accuracy in their presentations, with proper labeling and legends for visuals. The manual also highlights the importance of consistency in formatting and proper citation of sources to maintain professionalism and academic integrity in their work.
Supplements and Additional Resources
The 13th Edition offers online companion materials, instructor resources, and student supplements, providing additional support for both teaching and learning, enhancing the laboratory experience with interactive tools and guides.
10.1 Online Companion Materials
The 13th Edition provides extensive online resources, including a downloadable PDF version, interactive simulations, and supplementary materials. These tools enhance learning by offering virtual lab experiences, quizzes, and video tutorials. Students can access additional study aids, while instructors receive supporting materials to integrate these resources into their curriculum effectively. The online companion materials are designed to complement the manual, ensuring a comprehensive and engaging laboratory experience for all users.
10.2 Instructor Resources
The 13th Edition offers instructors a wealth of resources, including test banks, PowerPoint slides, and lab manual answers. These materials, available online, help educators create engaging lessons and assessments. Instructors can access customizable content to integrate seamlessly into their curriculum, ensuring a cohesive learning experience. Additional resources include detailed lab setups and safety guidelines, supporting effective teaching and student engagement in laboratory settings.
10.3 Student Supplements
The 13th Edition provides students with valuable supplements, including online companion materials and interactive activities. These resources enhance learning by offering review questions, lab preparation guides, and multimedia content. Students can access digital tools to visualize complex concepts and prepare for lab sessions effectively. Additionally, the PDF version of the manual is available for easy reference, ensuring that students have flexible access to all materials anytime, anywhere.
Digital Access and PDF Availability
The Biology Laboratory Manual 13th Edition is available in PDF format for instant download, offering flexible access to its comprehensive content and enhancing student convenience.
11.1 Downloading the PDF Version
The Biology Laboratory Manual 13th Edition is readily available in PDF format for instant download through various platforms, including McGraw-Hill and eBookSecure. The digital version, ISBN 978-1-264-13727-5, ensures easy access to all exercises and materials. Students can download the PDF directly, providing flexibility for studying and preparing lab sessions. This format is ideal for those preferring digital resources, offering convenience and portability for academic success.
11.2 Navigating the Digital Edition
The digital edition of the Biology Laboratory Manual 13th Edition is designed for easy navigation, featuring a detailed table of contents, searchable text, and interactive links. Users can quickly access specific exercises, view high-resolution images, and utilize built-in tools like bookmarks and annotations. The PDF format ensures compatibility across devices, allowing students to study efficiently on laptops, tablets, or smartphones. This user-friendly design enhances the learning experience, making it simple to locate and review laboratory materials.
11.3 Benefits of the Digital Format
The digital format of the Biology Laboratory Manual 13th Edition offers enhanced accessibility and convenience. Students can access the manual on multiple devices, including laptops, tablets, and smartphones, making it ideal for on-the-go study. The PDF format allows for easy searching, bookmarking, and annotating, enabling efficient review of key concepts. Additionally, the digital version reduces the need for physical storage and is environmentally friendly, providing a modern and practical learning solution for today’s students.
The Biology Laboratory Manual 13th Edition is a valuable resource for biology students, offering comprehensive exercises and modern techniques to enhance learning and scientific exploration effectively.
12.1 Summary of Key Takeaways
The Biology Laboratory Manual 13th Edition provides a comprehensive guide for college-level biology courses, offering detailed experiments and modern techniques. It covers essential topics such as microscopy, genetics, and anatomy, with over 50 exercises designed to enhance hands-on learning. The manual emphasizes scientific inquiry, data analysis, and safety protocols, making it an invaluable resource for students and instructors. Its digital availability further enhances accessibility, ensuring a seamless learning experience for all users.
12.2 Encouragement for Further Study
The Biology Laboratory Manual 13th Edition serves as a robust foundation for biology education, encouraging students to explore advanced topics and pursue deeper understanding. By mastering the techniques and concepts outlined, learners can transition seamlessly into specialized courses or research. Supplementing the manual with online resources and engaging in hands-on experiments will further enrich their knowledge. Embrace curiosity and continue exploring the fascinating world of biology to unlock its endless possibilities and applications.
References and Further Reading
For additional resources, refer to the 13th Edition of the Biology Laboratory Manual by Darrell S; Vodopich and Randy Moore, published by McGraw-Hill Education. The ISBN for the 13th Edition is 978-1-264-13727-5, and the 12th Edition is available under ISBN 978-1-260-44060-5. Supplementary materials, including online companions and instructor resources, are accessible through the publisher’s website. Explore these resources to deepen your understanding of biology laboratory techniques and concepts.